The Benefits of the Certificates Feature
Before diving into the step-by-step process, let’s explore the advantages of utilizing the Certificates feature:
- Enhance Member Engagement: Motivate your course members by offering personalized certificates, fostering a sense of accomplishment and loyalty.
- Brand Recognition: Customize certificates with your unique signatures, images, badges, and brand colors, ensuring each certificate reflects your professional image.
- Automated Issuance: Streamline the certification process with automated email notifications, providing instant gratification to members upon course completion.
Step-by-Step Guide to Creating Certificates
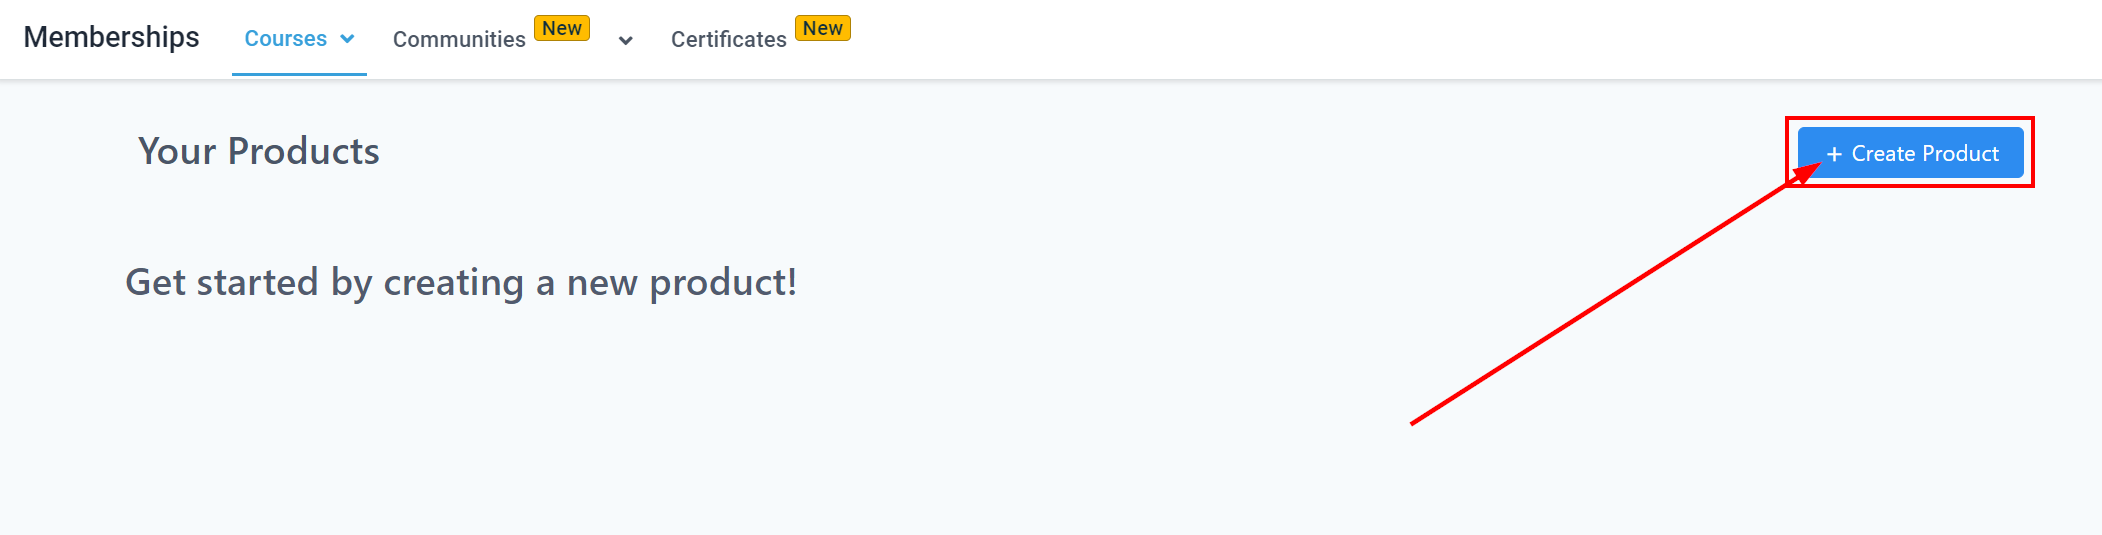
1. Create a Course
- Navigate to the “Memberships” section on the left panel.
- Click on “Courses” and then “Products.”
- Select “Create Product” at the top right to initiate a new course.
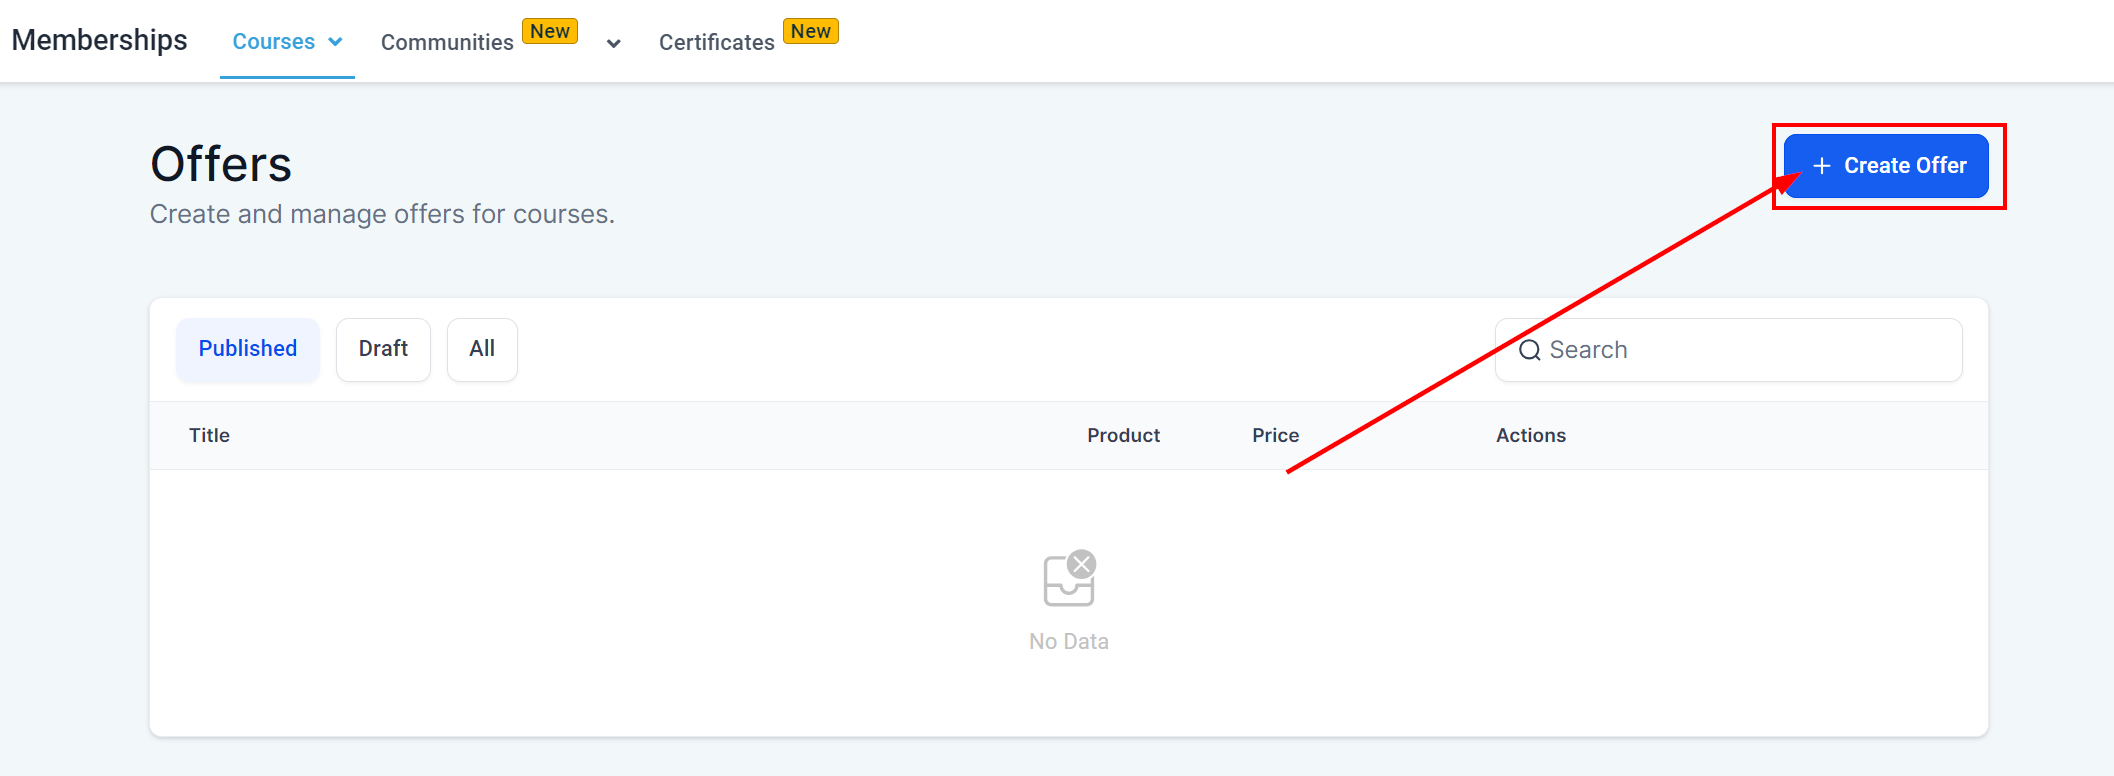
2. Set Up Course Offers
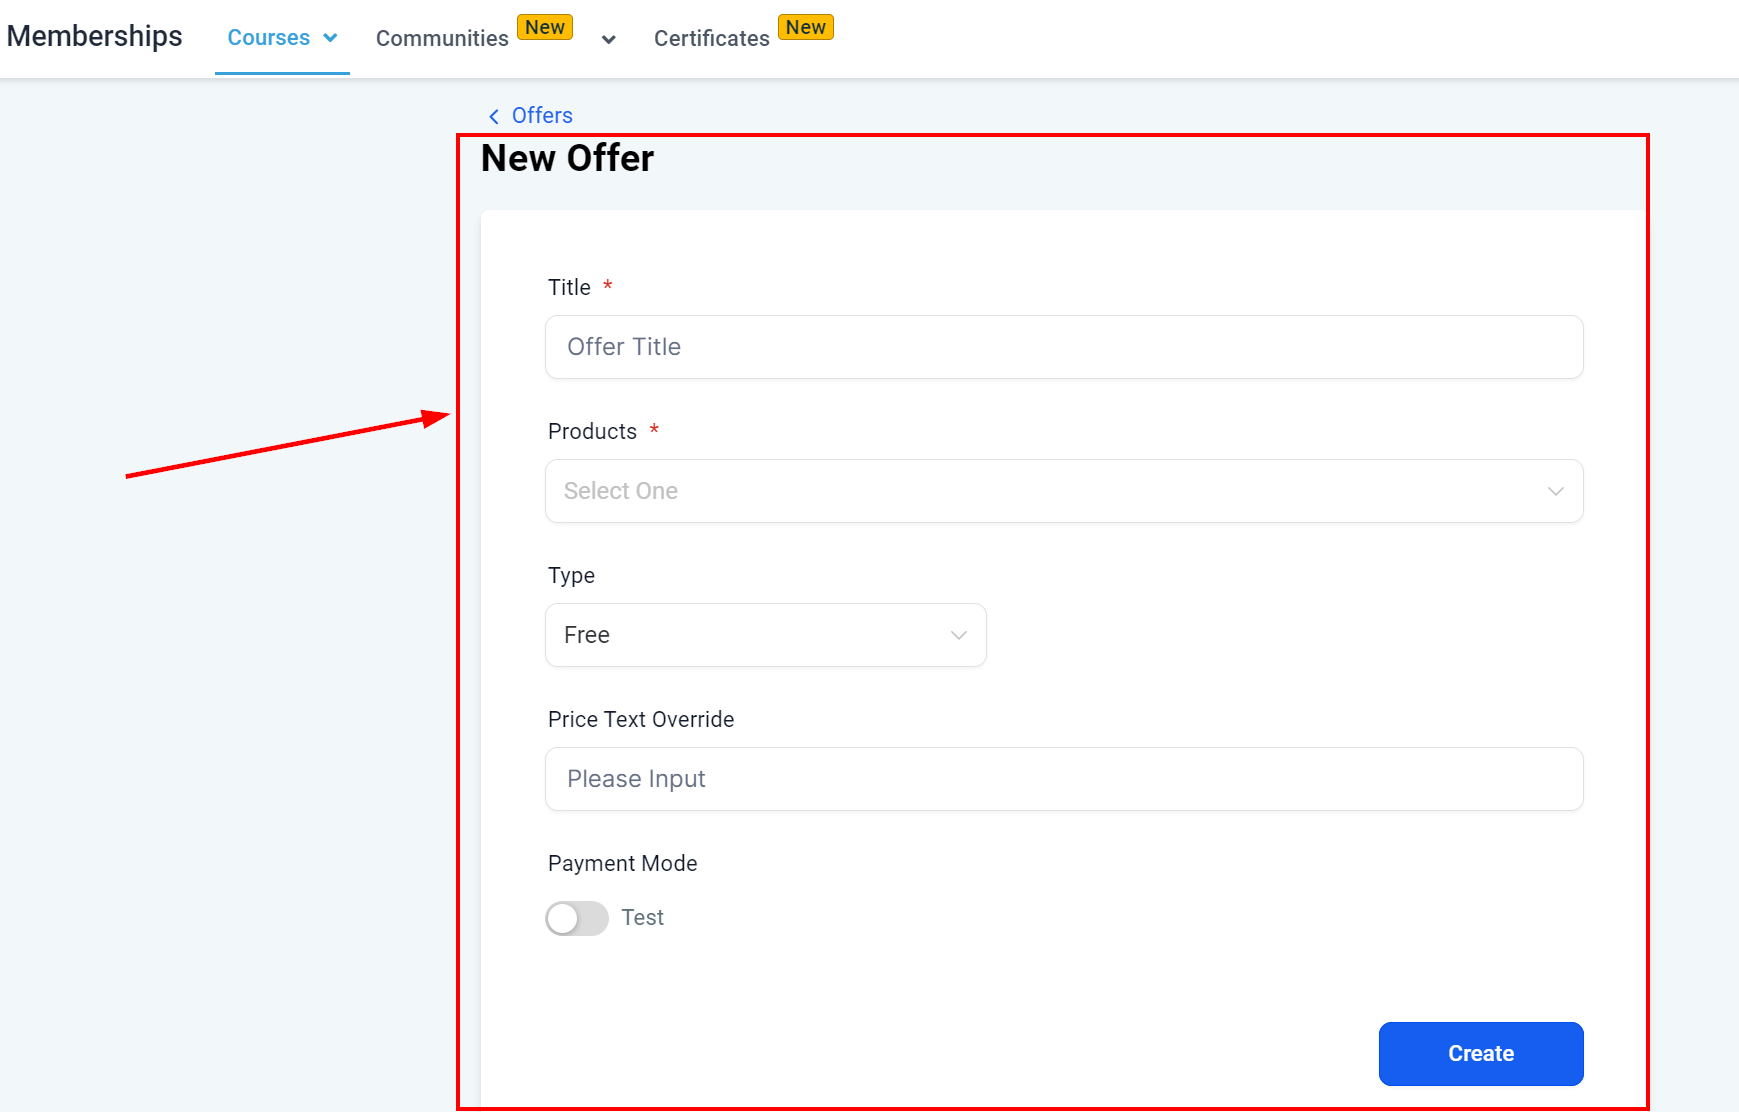
- Under the “Offers” tab, decide whether your course will be paid or free, setting the appropriate parameters for access.
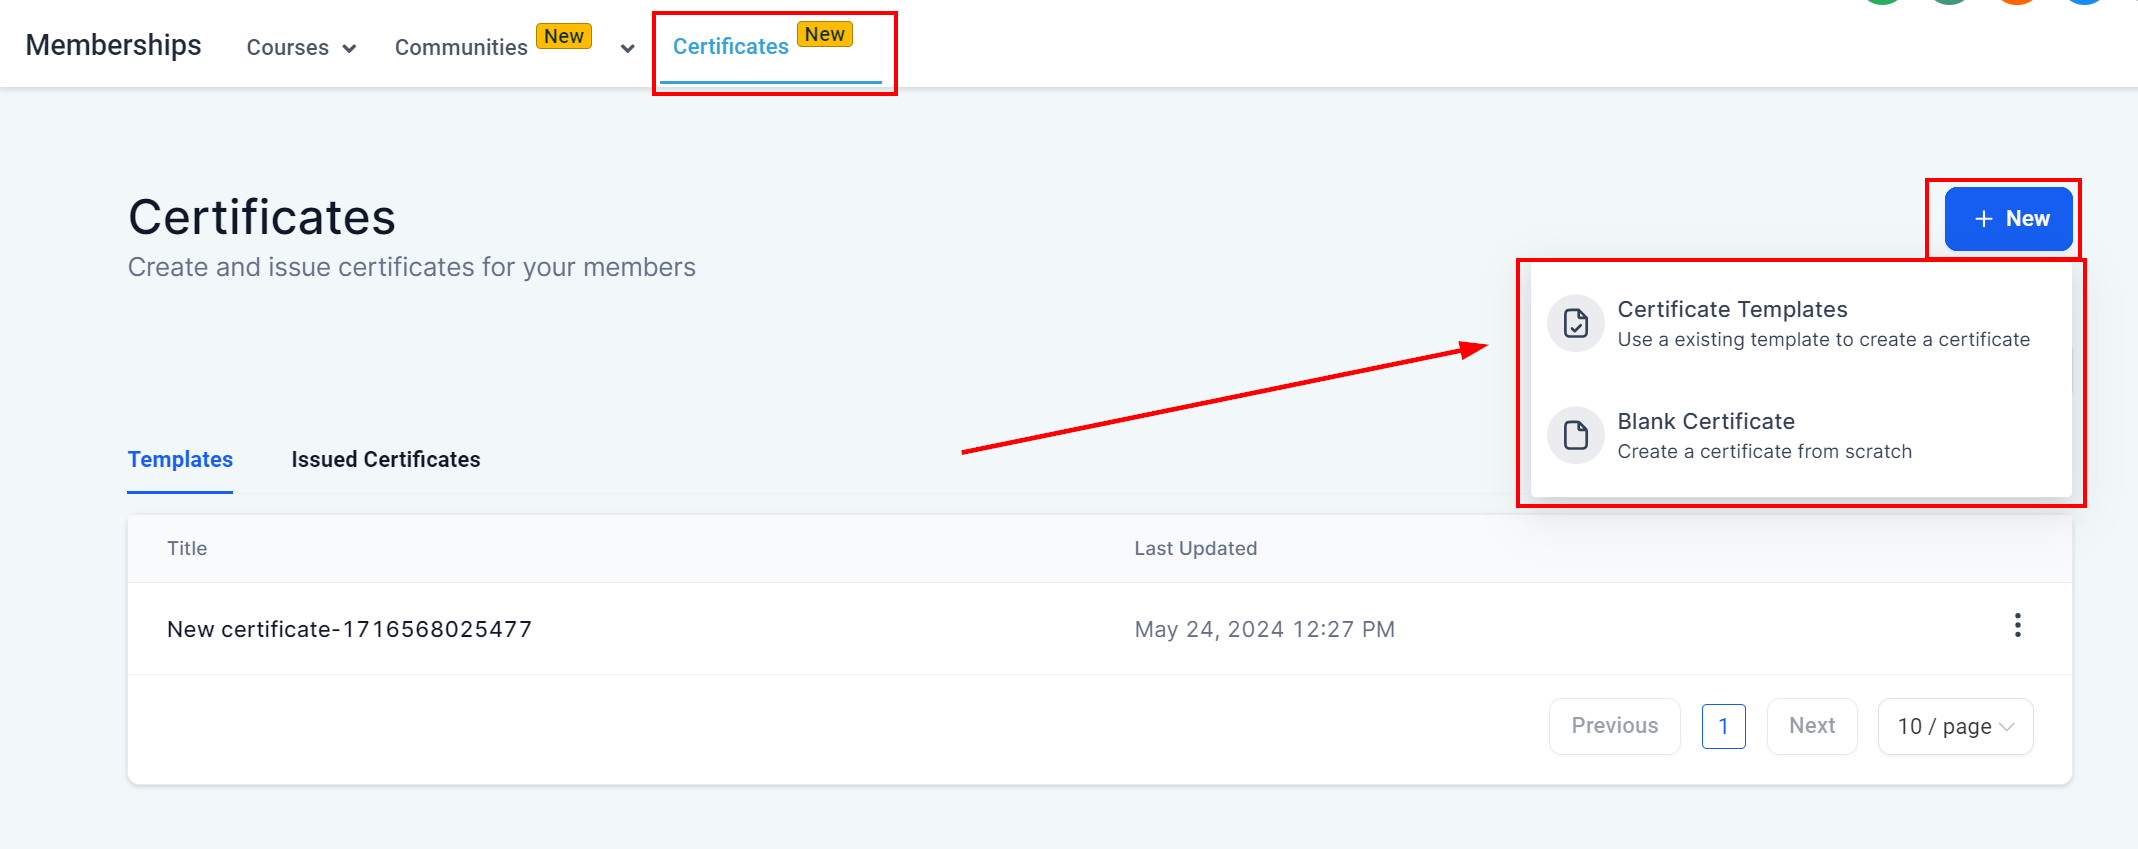
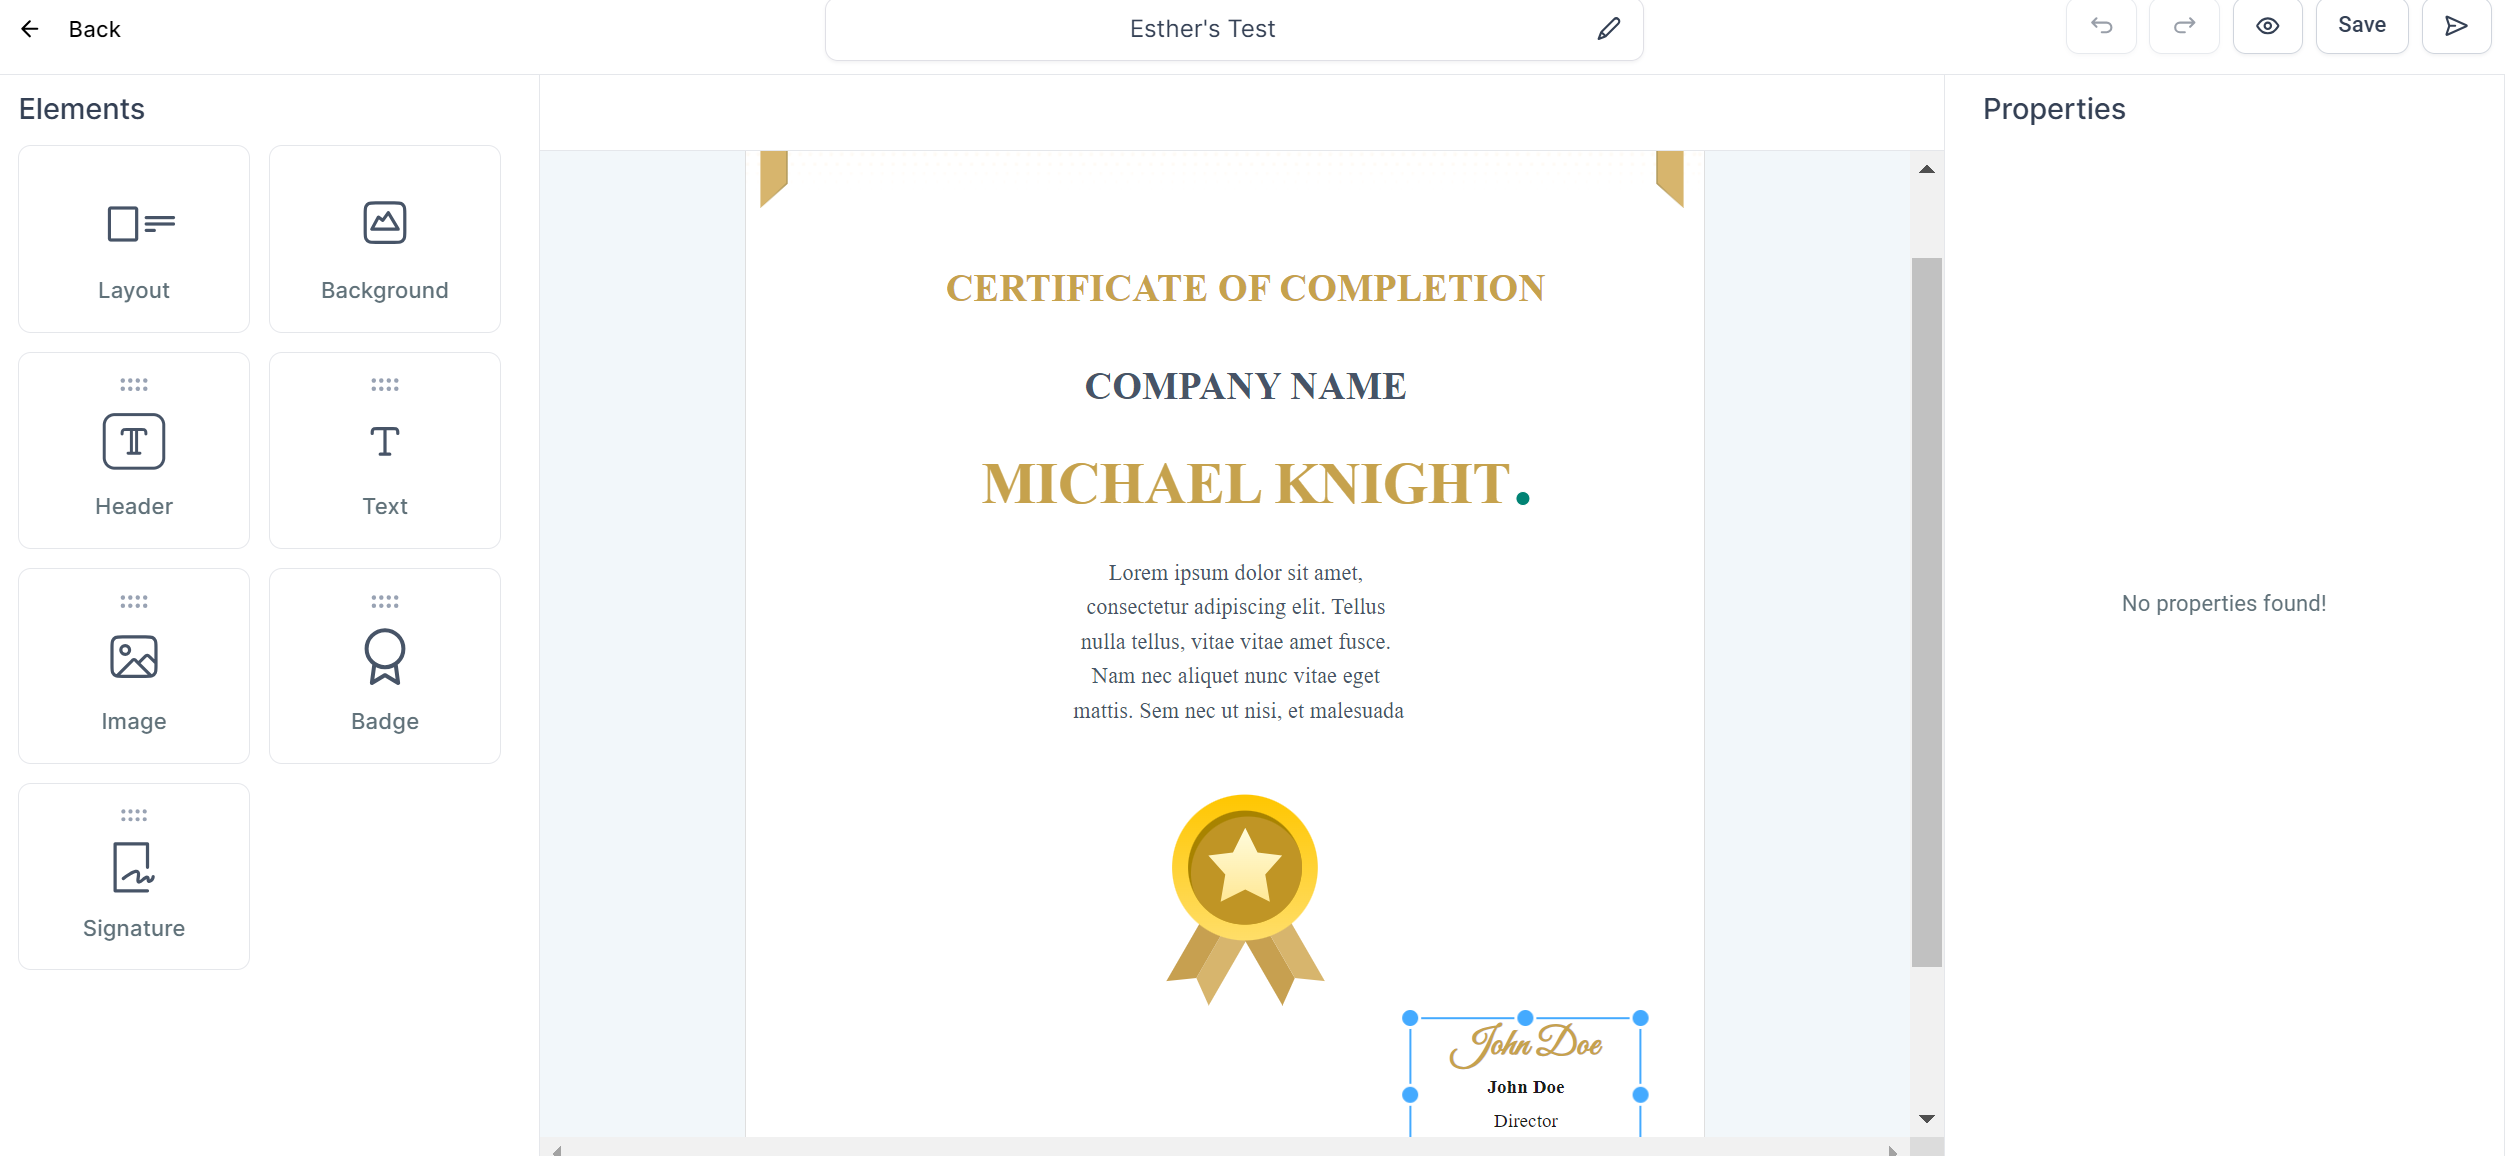
3. Creating Certificates for Course Completion
- Access the “Certificates” tab within the course settings.
- Click the “Add” button on the right to introduce a new certificate.
- Choose a template or start from scratch, depending on your preference.
- Customize the certificate design with your desired elements and branding.
- Save the certificate once the design is finalized.
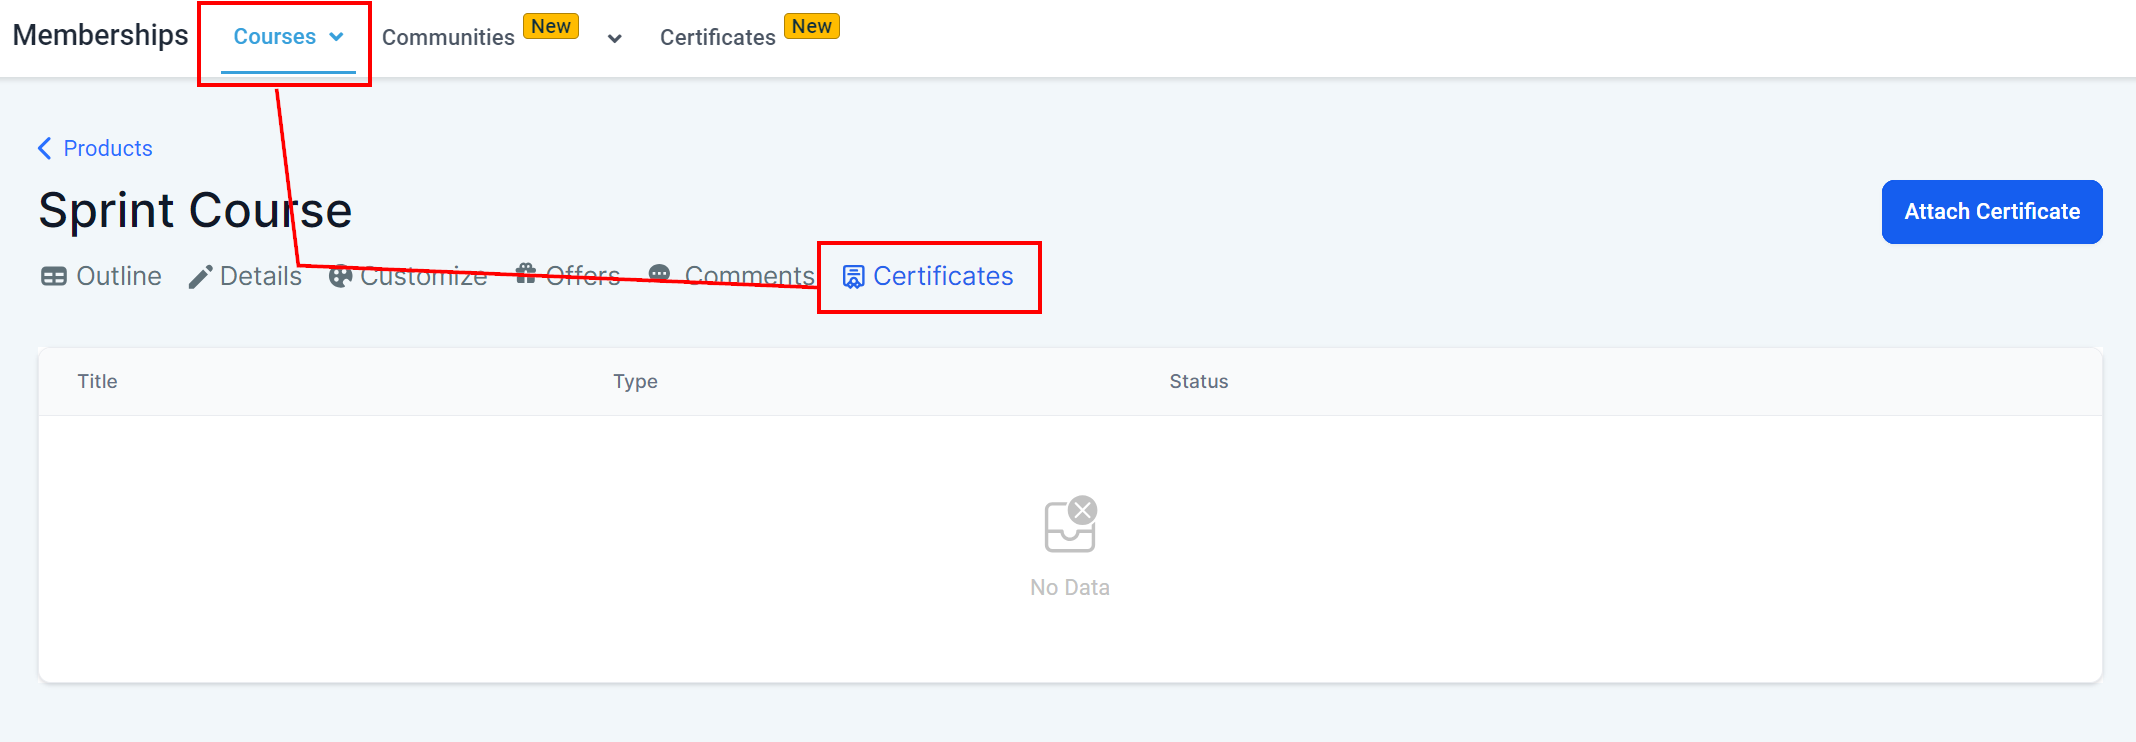
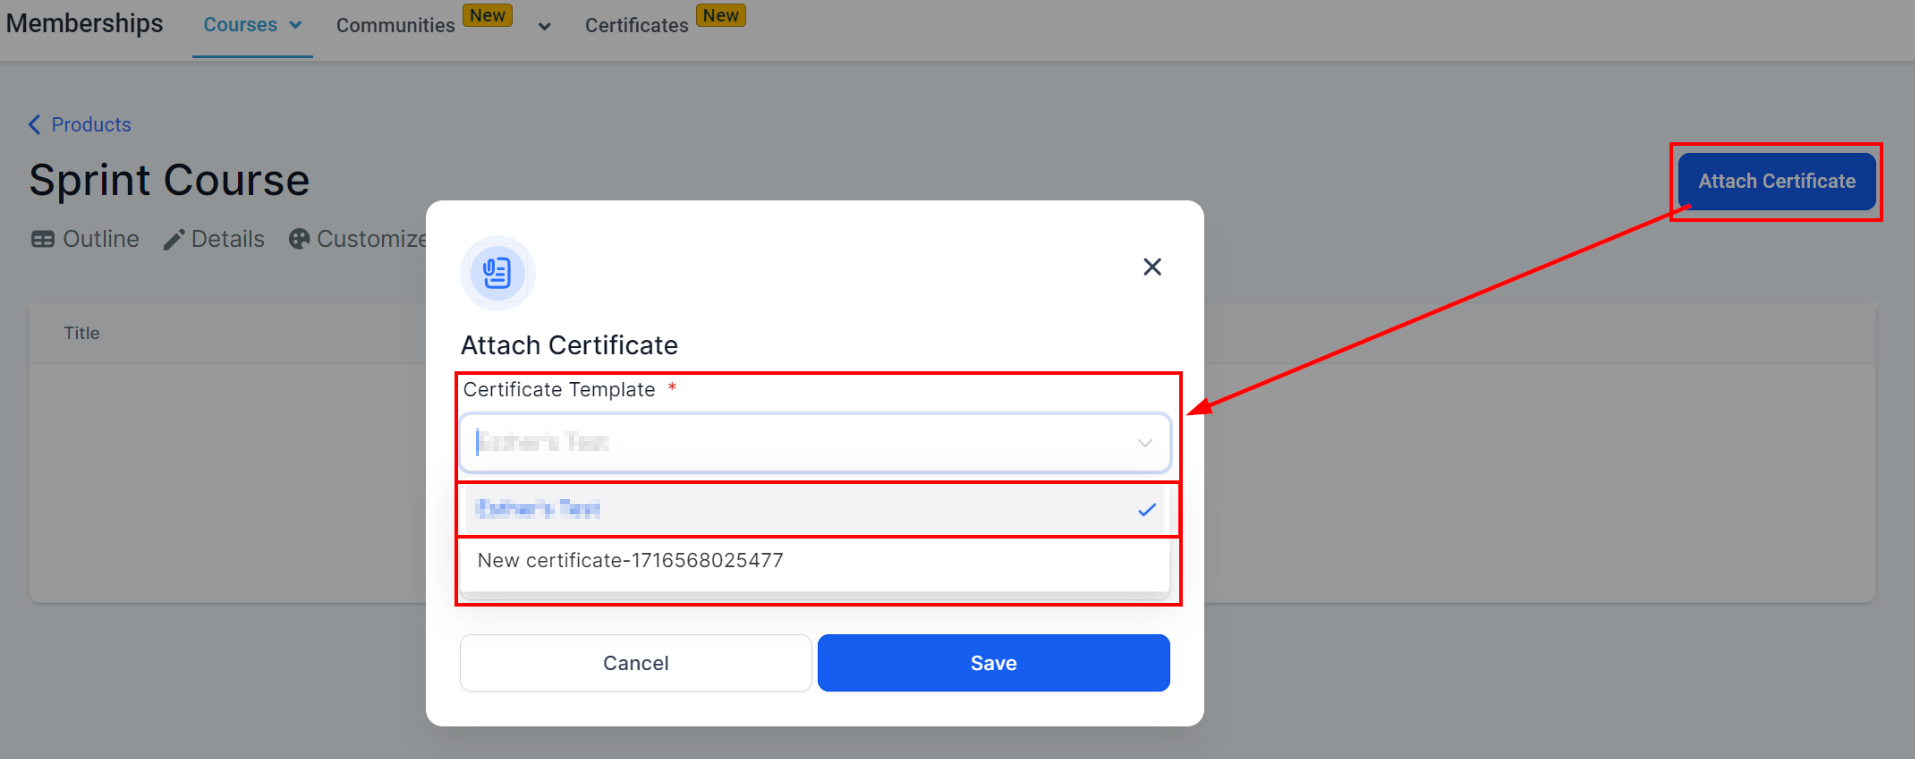
4. Adding Certificates to Your Course
- Return to the “Courses” section and select the course you’ve created.
- In the “Certificates” tab, add the certificate you’ve previously designed.
- Save the changes to ensure the certificate is linked to your course.
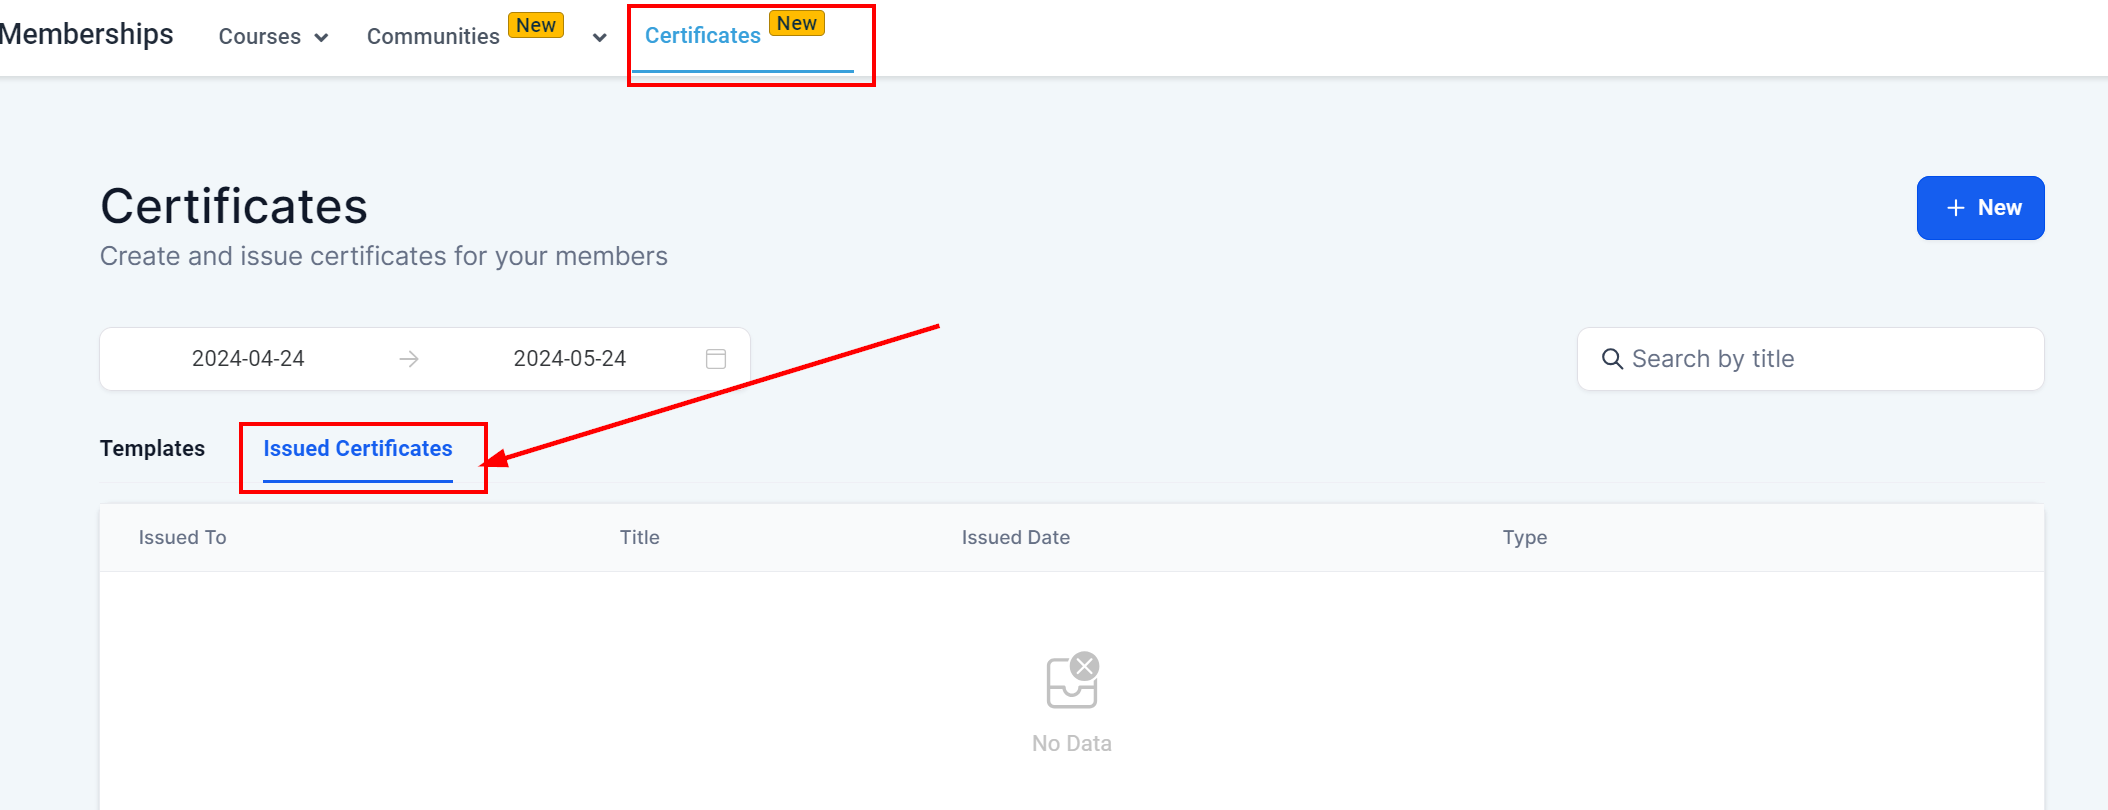
5. Issuing and Previewing Certificates
- Members who successfully complete the course will automatically receive an email congratulating them, along with a link to access their personalized certificate.
- Utilize the “Issued Certificates” tab to view and manage all certificates issued.
- Preview the certificate to ensure it meets your expectations and provides a positive experience for members.
Troubleshooting Tips and FAQs
Q: What if a member doesn’t receive their certificate? A: Check the member’s course completion status and ensure their email address is correct. Additionally, advise them to check their spam or junk folders.
Q: Can I customize certificates for each course? A: Absolutely! You can create and customize unique certificates for each course, allowing for a tailored recognition experience.
Q: How do I update a certificate after it’s been issued? A: To update a certificate, you’ll need to edit the original design and reissue the certificate to the affected members manually.